


What to know before installation…

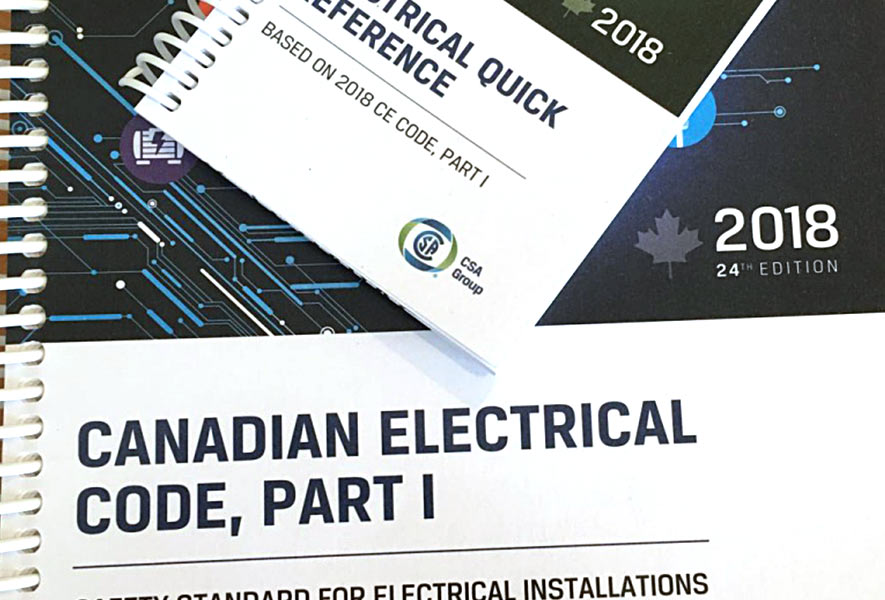
First off, we must take precautions and understand some basic rules and how electricity works to safely work with it. The Canadian electrical code is constantly changing. Every 3 years, a new edition comes out in which a committee has gone through and implemented changes and new rules. In addition to the CEC, there are also other rules that must be followed, such as local STANDATA’s. These can be variances or changes and additions to the CEC. This is why, especially in commercial or industrial settings, electrical installations are often better left to a master electrician. At CalTrac Services, all work is completed by licensed electricians in Calgary and area.
Then there’s the safety and danger aspect of the installation of electrical components. In most instances, when installing electrical equipment, power is located and disconnected. Ensuring the installation can be accomplished safely without electrical shock. There still ends up being the risk of incorrect wiring. From an intolerable unbalanced load, wrong neutral connection, improper grounding or bonding, and many other code violations.

I could make a book just on all the service calls I have been to that had extremely dangerous and/or outrageous wiring. One service call from years ago, I got called in for a fluorescent light in a kitchen not turning on.
So when I arrived at the house, the customer takes me to the light. He tells me that he changed the fixture himself and that it’s not working. Right away, assume, “oh, he must have connected a wrong wire, easy fix.” I turn off the switch and go to open the fixture, and immediately upon touching the outside of the fixture, I get a shocking surprise—a nice electric shock from touching the base of the fixture. So, at this point, I locate the breaker and disconnect the entire circuit. I open the fixture to find a hot wire, not the switch leg, tied directly onto the fixture’s bonding. Of course, I redo the connections, turn on the circuit, and test for proper voltage and function of the light.
That is one of the tamer stories, as I have seen many code violations throughout the years from self installers and fly by nighters. The point is, even if power is turned off and you can accomplish a safe install. In the end, when power gets connected to your new circuits, there is still the risk of improper installation. It could mean arching from poor connections, power on metal enclosures from improper connections, or many things. This is why it is imperative to know the code rules for what you are wiring, as well as have an understanding of how circuitry works. We won’t go into the depth of the dangers of electricity here, but there is a lot of information. The extreme heat caused by a small arc is more than enough to start a fire.
When your rough-in electrical wiring is completed, it is time for your inspection. For wiring done in your own home, most municipalities allow you to obtain a ‘homeowners permit.’ If you have a company work on your home or business, they must obtain their own permit. Be prepared when you have done the install to know the installation as the inspector will want to go through the what and how. They will confirm that important safety factors and code are in compliance. If there are deficiencies, you will need to correct them and most likely call for a re-inspection.
Below we will go through a general material and tool list. There are several articles out there that give false hope on the extremely low cost and insufficient tool list. Heck, I even read one article where it said you could wire your bedroom for 100 bucks. Now I don’t know where they get their wire or electrical devices, but I need to find out! Let’s see what’s needed for true and a more realistic look at how much money you’ll spend.
Tools and money

For most residential wiring jobs the list below should be sufficient:
- Low Torque corded drill for drilling holes
- 1″ Auger bit (12″ length preferably)
- Holesaw bits (These will be used for recessed lighting, or making larger holes where needed)
- Cordless impact
- Electrical hand tools (screwdrivers – robinson, philips, flathead, etc, strippers, pliers, needlenose, sidecutters, hammer, knife, ect)
- Ladders as required (4 footers are nice for quickly moving around)
- Circuit tester (if you are working on an existing house where you need to find power supplies)
- Cat5 crimps (if you are planning to do your own data)
- Coax stripper and crimps (again if you are planning to do you own data)
- Data tester (cat5 and coax tester for data finishing)
- Electrical meter (don’t get some cheap 20 dollar thing, get something reliable – this is used for confirming voltage, current, and testing ohmic values)
- Work lights (you may need this while you wait for the electrical finishing to happen)
This list for general reference. There maybe more or less tools depending on the job you are trying to accomplish.
Material
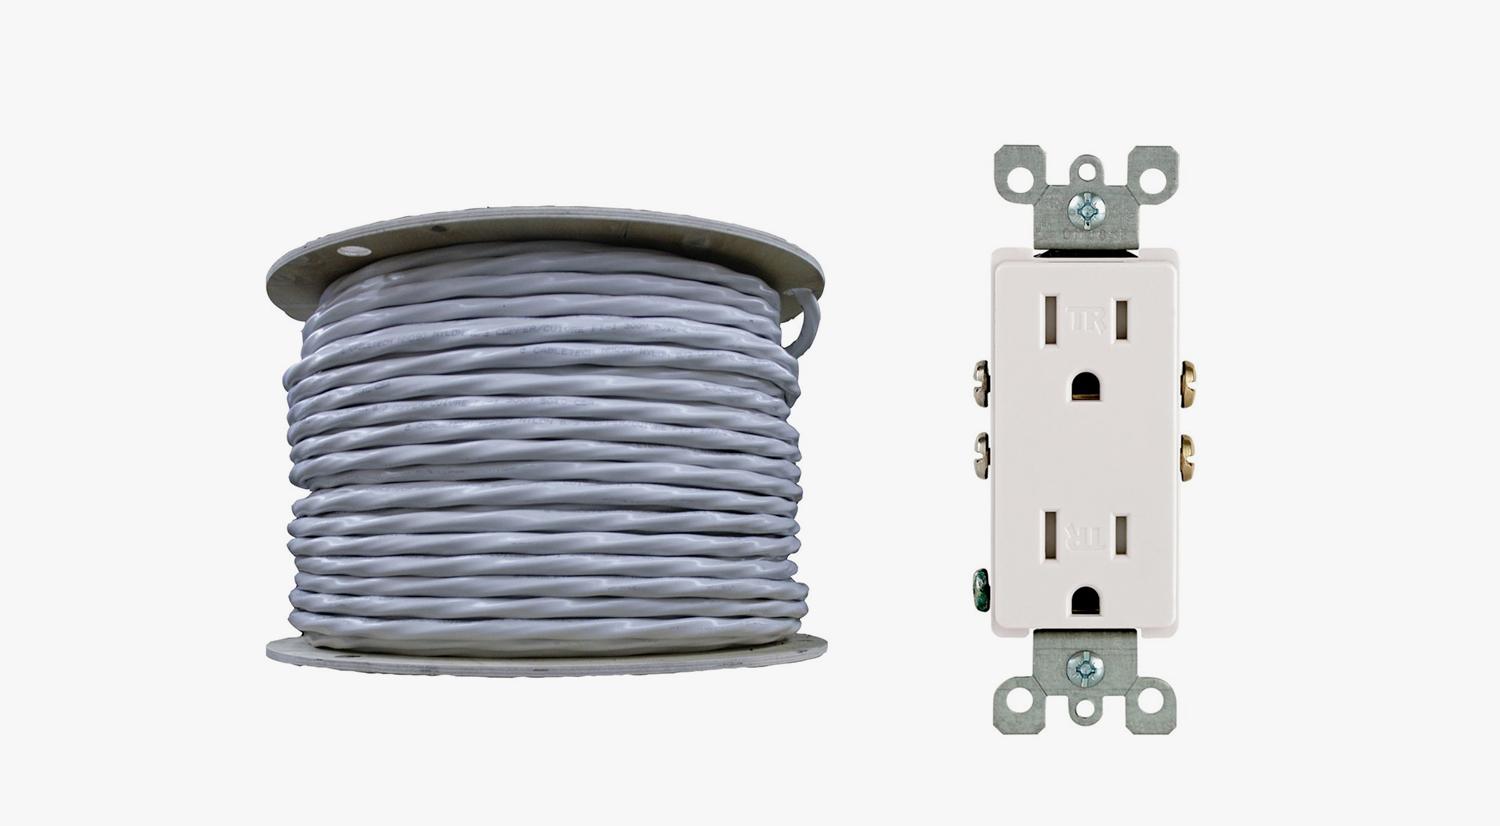
Material that will be needed, again is dependent on the job. Here is a list of some of the more common items needed residential electrical.
- 14/2 NMD (used for interior wiring of 15 amp branch circuits and feeders)
- 12/2 NMD (Yellow jacketed) (again interior wiring used for counter plugs and equipment rated for 20 A wiring and breaker)
- 10/3 NMD (used mainly for dryers – 30amp 240V)
- 8/3 NMD (used for ranges – 50Amp 240V)
- 14/3 NMD (this wire is used mainly for 3 and 4 way connections, devices for 120/240V)
- 6/3 wire (Used for larger items such as hottubs – note – if you are going to exterior areas you cannot use NMD but instead TECK90, NMWU, ACWU90, or RW90 depending if you are using a conduit or not)
- Interior wall device boxes (These can range from single gang to 4 gang, octagons for lights, 4 11/16 for ranges or dryers, and others)
- Exterior Plastic device boxes (On exterior walls, in order to keep the vapor barrier seal it is best to now use plastic boxes instead of 2104 with vapor barrier)
- S1 and S2 staples for securing wire
- 4004’s or some type of wire connector
- Fans for bathrooms and Kitchen
- Switches (single poles and 3 ways as required)
- Dimmers (note for 3 ways or LED make sure to buy the proper type)
- Receptacles (many variations and duplex or decora to choose from)
- Light fixtures
- Device cover plates
- Breakers (you will have to know how many archfaults/combination, 15A, 20A, 30A, 2 pulls etc to get)
- Fan interlock relays as required
This not a full list by any means but like mentioned it is some more of the common items that will be needed for your residential venture.

Let’s start…
Safety and code
Circuit capacity
Circuit capacity refers to the maximum amount of current or devices that you can place on a circuit. A circuit is a loop of the devices on breaker or overcurrent device. In residential most circuits are 15 amps.
For general use receptacles, you are allowed 12 devices (refer to 8-304 CEC rule). Most other common household circuits it is rated at 80% overcurrent capacity. So for a 15A circuit, we can go 120V x 15A x 80%, which equals 1440 watts or 12 Amps. More information on the capacity of circuits can be found in section 8 and section 14 of CEC.
For information on electrical wiring methods see section 12 and section 26. In section 26-700 – 714 it talks about receptacles and placement and requirments. For example, the wall space between receptacles and countertop spacing between receptacles. All these sections should be understood in order to properly wire, even for simple installs.
Calculations

Calculations of residential services and total ampacity required can be done through section 8 of CEC. This can become very complicated and is best left to a professional. For example, if your adding a legal suite, you may be required to do a full calculation. If the calculations end up at a certain point you may even need to upgrade your service to a 200Amp. This is a part that can be slipped by, and I have seen it happen. It is best to be prepared for it. So if you are adding a lot of power, you may best get a licensed electrician to do these calculations for you.
Tamper resistant receptacles

If we look again at section 26 of the CEC, we will find that many of the receptacles in a residential home are to be tamper-resistant. This is mainly for protection against someone, especially children getting electrocuted. For exemptions for tamper-proof, see rules 26-700 and 712. In general, it is a good idea to just install TR receptacles throughout as it won’t hurt anything.
Archfault and GFI circuits
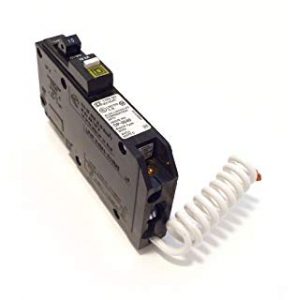
As we looked at above in section 26 of the CEC, we can see it gives information on the requirements of arc faults and GFCI circuits/receptacles. For example, any receptacle within 1.5 of a sink, basin, tub shall be protected by a GFCI device.
If we move to section 30 in CEC we can also see that a switch within 1000mm to 500mm will be required to be GFI protected. Section 26-720 explains a bit as well for combination arc fault devices. Most circuits that have an outlet installed will require a combination arc fault.
For exemptions on circuits not requiring arc fault protection, go through section 26. As a side note, if you have an older panel, a federal stablock does not have a combination arc fault available. You would actually need to run a dead front combination arc fault to achieve proper protection. It is good to note that the CEC can become daunting and confusing, especially if you have never gone to school. For example, you would have to go to section 62 to find out you would need GFI protection for heating devices near sinks or showers. This is a good reason why there are 4 years in Alberta apprenticeship and another 3 years before obtaining your Masters. The electrical trade is filled with many rules and is constantly changing code and safety implementations.
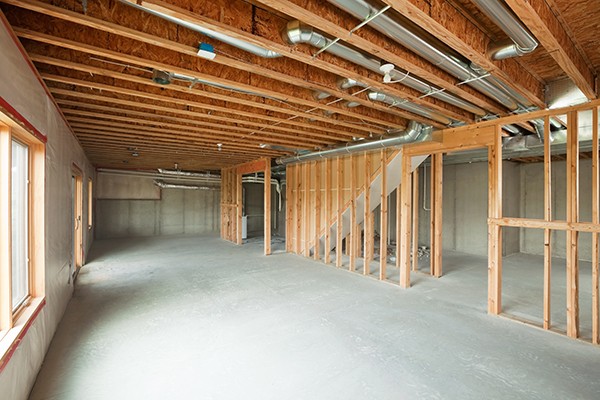
Roughing in electrical
Some quick tips:

- Keep track of the home runs (wire pulls from a device to the panel) you pull back to the panel and if they have an outlet on that circuit. This circuit will require an arc-fault most likely (again, it depends on the exemptions). It can be a pain to try and find all the circuits that require an arc-fault at the end, and nothing is marked.
- Try to keep your lighting and outlet circuits separated.
- On rough-in, finish all your connections in your boxes. If there needs to be pigtails or connections made, do them now (don’t be lazy). Because when you come back on finishing and can’t remember, you’ll be going around toning and doing a continuity test to find wires. I even strip the ends of the wires; this way, on finishing, you don’t have a bunch of ends to pick up off the floor.
- REMEMBER – 2018 code is here, and it has a whole wack of changes, additions, and deletions. One, in particular, is with switching. Each switch must have it’s neutral brought to the device box as well. This means no more 2 wire switch legs.
- When tying the wire into a switch box, be sure to mark the wires. For example, notch the wires that are switch legs from the light. And mark which wires go together, which travelers go with which wire. I tend to twist the wires that go together with each other and roll them into the box.
- Make sure you push your wires back in the electrical box. When it comes time for drywall, you don’t want the drywaller to end up cutting your wire in the box.
- With the above point in mind, always add a loop at each box. This is even a code rule.
Recessed/Pot lights
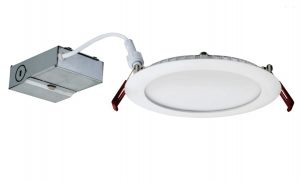
For potlight or recessed lighting, the days of installing a recessed lighting box are becoming less and less. You see before; if you wanted a recessed light, you would first install a can, either ICF or non-ICF depending on insulation and the manufactures rating.
Then on finishing, you would install the trim and light bulb. Not to say that these types of fixtures don’t have their place. But now, with technology comes change. You can now purchase LED lights with a depth of half an inch. This suggests they can be installed in many places where shallow depth is required. If you are doing new construction, it is a good idea to get the metal templates for the LED lighting. This way, when drywall goes on, the drywallers will know exactly where to cut out each hole. In addition to the benefits listed, these lights are LED and therefore draw far less power and can up to 20 years.
For circuit capacity, we can see that with a 9w light, we can put many of these lights on the same circuit. Compare that to a 100W fixture, and you can see the difference.
Kitchen Outlets
Kitchen outlets are to be either 20A devices or split receptacles. Nowadays, it is more common to run 12/2 and install 20 amp devices. More and more appliances draw more power, and it is less complicated to install. For example, if you require a GFCI on a counter, it is far cheaper to purchase a 20 A GFI than a 2 pole GFCI breaker. Any counter space more than 300mm will require an outlet, and there shall be no more than 900mm without an outlet. Also note, there cannot be an outlet directly behind the sink area. See section 26-712 for more info.
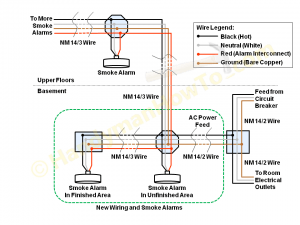
Smoke alarms
Building and electrical codes require smoke/carbon detectors. See section 32-110 for some information on the electrical aspect. For instance, the interlocking of all the smoke detectors is a requirement. We can accomplish this by using a 14/3 cable between each detector. It also requires the detectors to be feed from a circuit that has lighting on it. Usually done by connecting to the hall lighting circuit. One reason is if the lights go out, we’ll fix them or rather know that they need to be fixed. Where if it was an outlet or by themselves, it might end up going unnoticed.
The new code also requires detectors to be installed and interconnected in more locations in a dwelling unit. In each bedroom, you are required to have a smoke detector as well.
Building code and plastic boxes
New building code has come into effect, essentially making metal boxes with vapor barriers obsolete. This is due to the type of airtight seal required in new homes. It is far more efficient to use plastic boxes with foam seal on the connections in new installations. These will be required on any exterior wall, including the attic area.
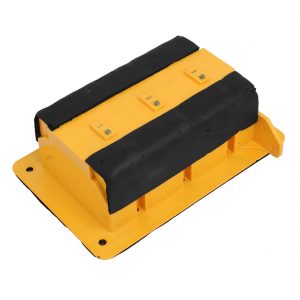
Exterior lighting and wiring
During roughin stage any lighting or devices required outside need to be completed. Trust me you dont want to be trying to fish new lines that were forgot through brand new painted drywall. So if you are going to require circuits for say lighting post, soffit plugs, irrigation, or AC now is the time to run them. Keep in mind that exterior wiring is different than interior. For instance if you are burying wire you will need to use a wire that is rated for underground or exterior use. One of the more common ways is to run PVC (pipe) from the side of the house underground and come up to the location needed. Keep in mind mechanical protection for the wiring, seal connections, proper bonding of equipment.
3 or 4 way
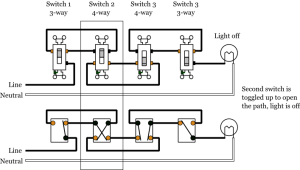
Wiring a 3 way or 4 way can be a tricky thing for a novice or even an apprentices to learn. With a 3 way, you will need 2 travelers between the 2 switches. Then at one end, you will have a constant hot, and on the other, you will have the switch leg (A black/red wire going to the light for switching on and off). So however you make this happen is fine. So one switch will have 2 travelers and a hot, and the other will have 2 travelers and a switch leg. For a 4 way, you continue the travelers from the switch to switch to switch and on and on to nth way. Inside the 4 way, you will have 4 wires, 2 travelers from the first switch, and 2 travelers from the last switch. To get a better idea, look at the diagram below.
Hot tub or spa
Lots of people have a hot tub. I do, and I know I love it, and so do the people that come over. Most people know that water (I should say non distilled) and electricity don’t mix well. Then add people in the mix, and that’s just dangerous. So if you plan to wire a hot tub, it is best to hire a professional and someone who knows the code rules and reasons for them. First, you will have to find a way to get your wire to the outside location. Once there, you will need to install a disconnect or, more commonly call a spa pack. This includes a GFCI rated at your hot tubs manufactured rating. Common sizes are 40, 50, and 60 Amp.
Also, note most hot tubs require copper wiring, so it’s a good idea not to cheap out and buys aluminum here. Ensure all components are rated for the ampacity of the hot tub. If you look at the nameplate of the hot tub, you can see the manufacturing requirements. It usually even tells you the size of the cable required and the size of the overcurrent device.
Service and panel installation
For brand new homes, a meter, panel, and service wiring need to be installed. Most municipalities require a ticketed contractor with a business license to install these. As well, this is something that is best left to a licensed electrical company. Here at CalTrac, we would be happy to assist you with electrical work.
These rules are mainly found in section 6, and for dwelling units, table 38 can be used to find correct overcurrent and conductor sizing. However, there are many other references throughout the codebook, including the Alberta Standata.
The utility company will sometimes leave the wire buried for new homes, or else you will need to run the wire. This is something to find out. You will also need an inspection done and a site id to connect power for the utility company.
In simple terms, the process is as follows. Most utility companies, such as Enmax and Fortis, have their own guidelines and set of rules for installers and electricians to follow when constructing a service. For residential, certain areas can be cold or hot sequences. For this example, we will use the hot sequence as it’s more common in residential. This means there is no disconnection means before the customer’s meter or supply portion.

Most new services are underground, and most old or re-done services are overhead. A meter base is mounted on the side of the house at a specific height. This is then running, usually with pipes such as PVC to the inside. Note here, there are code rules to follow and understand, such as the maximum distance you can run inside a dwelling unit. Once the wire is in the inside of the building, it is connected to the panel. There is also the connection of the grounding and bonding of metallic enclosures. This a simple rundown of the procedure and is not meant as a tutorial for connecting a service or utility wire. You will need a professional to install this portion, as it is imperative to get it right. More information on services can be found in this article, Panel Upgrading and Service Upgrading.
Also, with the 2018 CEC, there are new code rules to follow. Such as grounding of systems starts on the supply side. Meaning the identified/grounding conductor must be on isolated lugs in the meter base. On a system, there should be only one point that is grounded. It can now be in the meter base or panel. Care has to be taken to remove any jumpers, such as a jumper screw in the main panel. As a side note, when installing a subpanel, it should be noted that the jumper should be removed in this panel. This would still be part of the same system and therefore is only bonded.
Wiring for smarthome
Smart lighting
There are more and more products and companies coming onto the market now for smart home functionalities. The one you choose is simply dependent on what your needs are. For instance, on one home we wired, we wanted everything to be controlled from Google home. The multiroom speakers, lights, irrigation, thermostat, doorbell, and locks. It’s a good idea for smart homes to keep in mind to be able to control devices from your phone or computer; you need a hub. Some common manufactures are Insteon, Lutron, Z-wave products, etc. For the following, we will use Insteon as an example. The reason being is because they offer a lot of products and diversity.
For the most part, you rough in electrical the same way as traditional electrical. Most smart switches will require a hot, neutral, and switch leg from the light. As per the new CEC of 2018, all switches require a neutral now anyway, so this shouldn’t be a worry. The one difference is when you were 3 or 4 ways with smart switches. The 2 travelers are not needed and end up being capped off or used to get power to the other switch.
Note that you should always rough-in your home as per standard electrical. This will ensure you can always use normal or non-smart home switches and devices if wanted. For example, if you plan on selling or changing your home down the road.
Irrigation
For irrigation connecting into your smart home, there are a few options. The one we have used most is b-hyve. This is because it works by voice control through google home.
Thermostat
There are many options to choose from when it comes to thermostats. For smart home integration, they, for the most part, do the same thing. You are able to connect through an app and control from remote locations. They can get local weather and control through automated schedules. The wiring for smart thermostats is the same, except you will have to make sure you have a ‘C’ wire. A c wire or ‘common’ wire is a wire that comes from your furnace and sends a constant 24 volts. Most wifi thermostats require it for power. So when you’re doing your rough-in make sure to run enough wires to have a c wire as well. It’s a good idea to run at least a 6 conductor anyway for future use.
Doorbell and locks
For doorbells, you will not need to change any of the wirings. Just run you 18/2 from the front to the doorbell and another 18/2 from the doorbell to the downstairs panel area for power. Take a look at the common wiring for most residential doorbell systems. Note that most units, such as the ring, require you to recharge them via a cable. There is no requirement for the wiring for most residential applications for door locks and integrating them. They are powered by batteries mostly.
Smarthome integration of Multi room speakers
Multiroom speakers are an amazing feature to have. Here we will only discuss the integration of google home and multiroom speakers. This feature can become extremely expensive, into the 10’s of thousands. As traditionally, you would have an amp and run wall plates/selectors and ceiling speakers. But with technology comes many changes, and this time for the better.
There is a couple of ways you can do this, the way I prefer is using ceiling speakers and a multiroom amplifier. The idea is to hook up Chromecast audio devices to each speaker. These can be bookshelf speakers, or you can run wire for ceiling speakers. If you run ceiling speakers, you will need a central multi-room amp with RCA inputs for individual pairs of speakers. Because Google Chromecast audios can be grouped and individually selected, you can play different audio in different locations. Also, because it’s Google, you can use voice commands. Such as “Hey Google, play rock playlist in Mast bedroom” and poof, you got music going.
Sensors
Sensors are devices that can let you know of open or close, or water leaks, or day or night, or motion detected. For the most part, these are becoming more and more wifi for residential/homeowner use. They are not a true alarm system but more so an indicator for your personal use. For example, you can remember if you shut the garage door, well, look on your phone app. Or your upstairs washer is leaking; you will be notified of the presence of water from your phone.
Most sensors require a hub and batteries to operate. For instance, the Insteon light switches and sensors can use the same hub. You will know when your door is opened, a light turns on, or a motion is detected. As for wiring, because most manufacturers are based on wifi, there is no wiring needed.
Inspection of installation
Once your rough-in of electrical is completed, you will be required to have an inspection. Because this is wiring done by yourself, it will require a homeowners permit. For more information call your city for information. There will be 2 parts to most electrical inspections: a rough-in and a final. A rough-in inspection is important to complete, not just for the safety and compliance aspects. If electrical work was done without one, you could be required to take down finished drywall. You can also end up being fined. I can’t tell you how many times I have been asked to come in and verify electrical that was never inspected. It can become a big bill in the end.
Finishing electrical and connecting power

Once your walls are finished, you’re ready to connect devices. First, go around and count how many of each device are need and how many wall plates. Count the number of breakers required if they are not completed. Keep in mind the arch faults required. These are required where you have receptacles being feed from a circuit, excluding any exemptions. Once all devices are on, you can begin to power up your system.
Here go around one more time and confirm all JB’s, receptacles, switches, and any other electrical connections are complete. Once confirmed and confident, you can start to turn your circuits on one by one; if nothing trips, you will most likely be on the way for completion. But if something happens to short out and trip the break, you’ll have an issue to resolve.
These issues can be from nails or drywall screws puncturing the wire to doing an incorrect splice somewhere. You will need to find out the circuit that is tripping and what it feeds. Find the first device and (with the power off) test for continuity between hot and nutrient. If you have continuity, it is hopefully a bad connection somewhere. You can start with the first device work your way down until you find the issue. We won’t go into too much detail on troubleshooting here but perhaps in a later article.
Once all the circuits are on, go around with a plug tester, test each plug and test all your switches. If everything is working and the proper voltage and correct polarity, then mark your panelboard. This is easier with 2 people as one can flip the breakers and go around with a tester. You have to mark every circuit breaker you have, so make sure this is done accurately.
Closing
In conclusion, we can see an abundance of rules to follow, even when it comes to a simple residential installation. If you’re not confident in your ability, it is always a good idea to hire a licensed professional. We all like to save money, but sometimes it is better to leave it to someone with years of experience. If you do happen to hire someone, make sure to hire someone who is ticketed and licensed. The last thing you want is to save a few bucks to hire joe blow, and he can’t even get a permit or forgets lines to connect. We have seen it all too often when someone calls and needs to troubleshoot an entire house or request a concealed permit because they never got one.
In the end, if you do complete the work yourself, follow the rules, go slow, and get an inspection done. If it seems like something you like to have a professional electrical company take a look at, don’t hesitate to give us a call at 403-651-2621. We take extreme pride in our work and love what we do, and if you need help with a project, we would love to advise and work with you. We serve Calgary and the area with high quality and satisfaction guaranteed. CalTrac – Calgary Electrical Company.
Ask a professional to install electrical wiring. Electrical systems are potentially dangerous. Even if you’re a skilled DIYer, consult with a professional before installing new wiring or electrical appliances. Licensed electricians have the skills and knowledge needed to keep your home safe and in compliance with electrical codes.
Hello! I could have sworn I’ve visited this site before but after looking at a few of the posts I realized it’s new to me. Anyhow, I’m definitely happy I stumbled upon it and I’ll be bookmarking it and checking back frequently!
Led pannel lights, 2×4 in residential basements.
Do I have to use BX. cable from light fixture, to junction box to meet code?
Almost all districts you won’t have to run AC90/BX unless it is exposed and requires mechanical protection.
I have a question.
I have an electrician friend that swears that when installing a switch box
it should have the ground at the top and not the bottom.
I’ve tried to research it and didn’t find an exact answer; however, when looking at material,
it shows ground on the bottom.
We live in NL and the answer I’m given it that the rest of Canada has different rules.
Could you clarify this for us.
Thanks
Most switches have the ground terminal on the bottom. Some switches don’t have any, it just depends on the product you buy. Although in 2018 the code (10-612(3)(5)) changed to indicate bonding. As Ontario has went back to not requiring bonding of switches in the new CEC will also go back to before 2018. In the end connect the bonding wire to the bonding screw when there’s one and you should be fine.
Great information.
I do however believe it is arc fault, not archfault?
Yes you are most correct. Thanks